
DIY Paper!
- Apr 15, 2015
- 5 min read
Level: Easy
Time: 1 Hour (but set aside more time because you'll probably love this and keep going!)
Cost: Less than $10
We're so excited to share this tutorial with you! If you have a bin of shredded paper or are like 95% of the american population which receives grocery ads and junk mail every week in your mailbox, then this is the tutorial for you!

We love paper, thin paper, thick paper, origami, newspaper, cold press, you name it! We also hold a special affinity for newspaper. Maybe because we grew up in a family who got the paper everyday (our dad would actually finish the crosswords most days, *goal set*) and we had a wood stove for heat growing up in Timbucknowhere, so you never threw away newspaper, you used it to start the fire every morning. However, this stashing tendency can get dangerous if you live in a place where you no longer have a wood stove and the only thing you do is store the glorious newspaper and advertisments which grace your driveway and mailbox daily. So what do you do with all this recyclable stuff? ANSWER: Make more paper! This is such an easy process, and We're pretty sure you'll be writing letters and drawing and making banners in no time! But for now let's just cover the basics.
What you'll need:
-2 inexpensive picture frames, for the Mould and Deckle. (Ours are 4x6", $0.94 at Walmart)
-1 piece of screen slightly larger than the picture frame you'll be using. (Ours was 7"x9")
You can use old window screen or buy a roll of bug screen at The Home Depot for around $5.
-Stapler, it helps if it's industrial rather than an office stapler.
-Scissors
-Bits of old paper (we used a double page grocery ad to make 10 pages of 4x6" paper)
-Sponge
-paper towels
-Blender (we used our Magic Bullet blender attachement)
-Baking Pan or Water Tub, big enough to submerge your paper making frame.
-Water - enough in the tub to submerge the mould and deckle, plus a few cups more to blend
with your paper shreds.
-Extra pieces of screen (larger than the size of paper you will be making) for the drying process


Mould and Deckle: I want to assure you, it will take you longer to read about them than make them. It will just help give you the terms we'll be using. The "frame" is used to make paper, it's the combination of the Mould and Deckle together. The "mould" is the bottom half, which includes the screen that the paper pulp will rest on. The "deckle" is the upper portion, which rests on top of the mould and determines the shape and size of the paper being made. There are many different versions of this mold and deckle setup; for this project we making what's called a "pour mould".
Start by making the "frame"
Take one of your 4x6" picture frames and remove the back and the glass. Tightly stretch the screen over the flat back side of the frame and around the edge and staple.
It helps to staple one edge then pull across the frame to staple to the other edge.

Repeat for the remaining two sides and fold over the corners and staple those as well.

This is your mould (back and front)


For the Deckle, all you need to do is remove the backing and the glass of the other picture frame. This should be the same size as your mould and will sit right on top of the screen stretched across the mould.

Now that your frame is complete, tear up or gather about two handfuls (or 1 cup lightly packed) of shredded paper. We hand tore a double page newspaper ad for this tutorial.

Pour water (more water than paper) in your blender and add the torn paper

Blend for 15 seconds intervals until you see the paper start to look pulpy (thick cloudy liquid with clumps).


Now you're ready to make the paper sheets!
Fill your tub with enough water to fully sturate your frame (mould and deckle together)

Slowly pour the pulpy paper mixture into your frame.

Softly jiggle the frame side to side or use your hands to tap the paper mixture until you have a consistant floating flatish surface.

Once you have a fairly even surface, lift the frame out from the water. You will see the paper settle on the screen and water dripping from the frame.

After about 10 seconds remove your deckle to reveal your paper sheet left on the mould.

Carefully tilt the mould to drain any more excess water.

Place your mould onto a paper towel on the counter or work surface.

Place a loose screen over the top of the wet paper making sure the screen extends beyond the edges of the paper.

With the loose screen in place over the paper, lightly sponge the surface.

Repeat until you have pulled out as much water as you can. Then, carefully lift the loose screen, to see if the paper has transfered to the loose screen. You wil either see an easy lift or parts which are still stuck to the mould.

If the paper hasn't transferred completely, put the loose screen back down and sponge again until you find a corner that will lift and peel away the paper from the mould.

Now you have a sheet of paper ready to be dried.

Hopefully it's sunny where you are so you can speed up the drying process by laying the screens out in the sun to dry, making sure to anchor the corners to prevent blowing away and abundant curling.

Repeat these paper making steps until you have used up all your pulp (or amount of drying screens which happens when one starts going paper making crazy).

Once your paper is dry enough to remove from the screen (you will see it is much lighter in color and perhaps even pulling up from the screen) you can peel away the screen and reveal your paper.


To flatten or press your handmade paper, simply find a hard surface, place your paper and stack heavy books on top.

If you can stand it, leave these over night, if not, an hour or so should do. Then, voila, your finished paper!


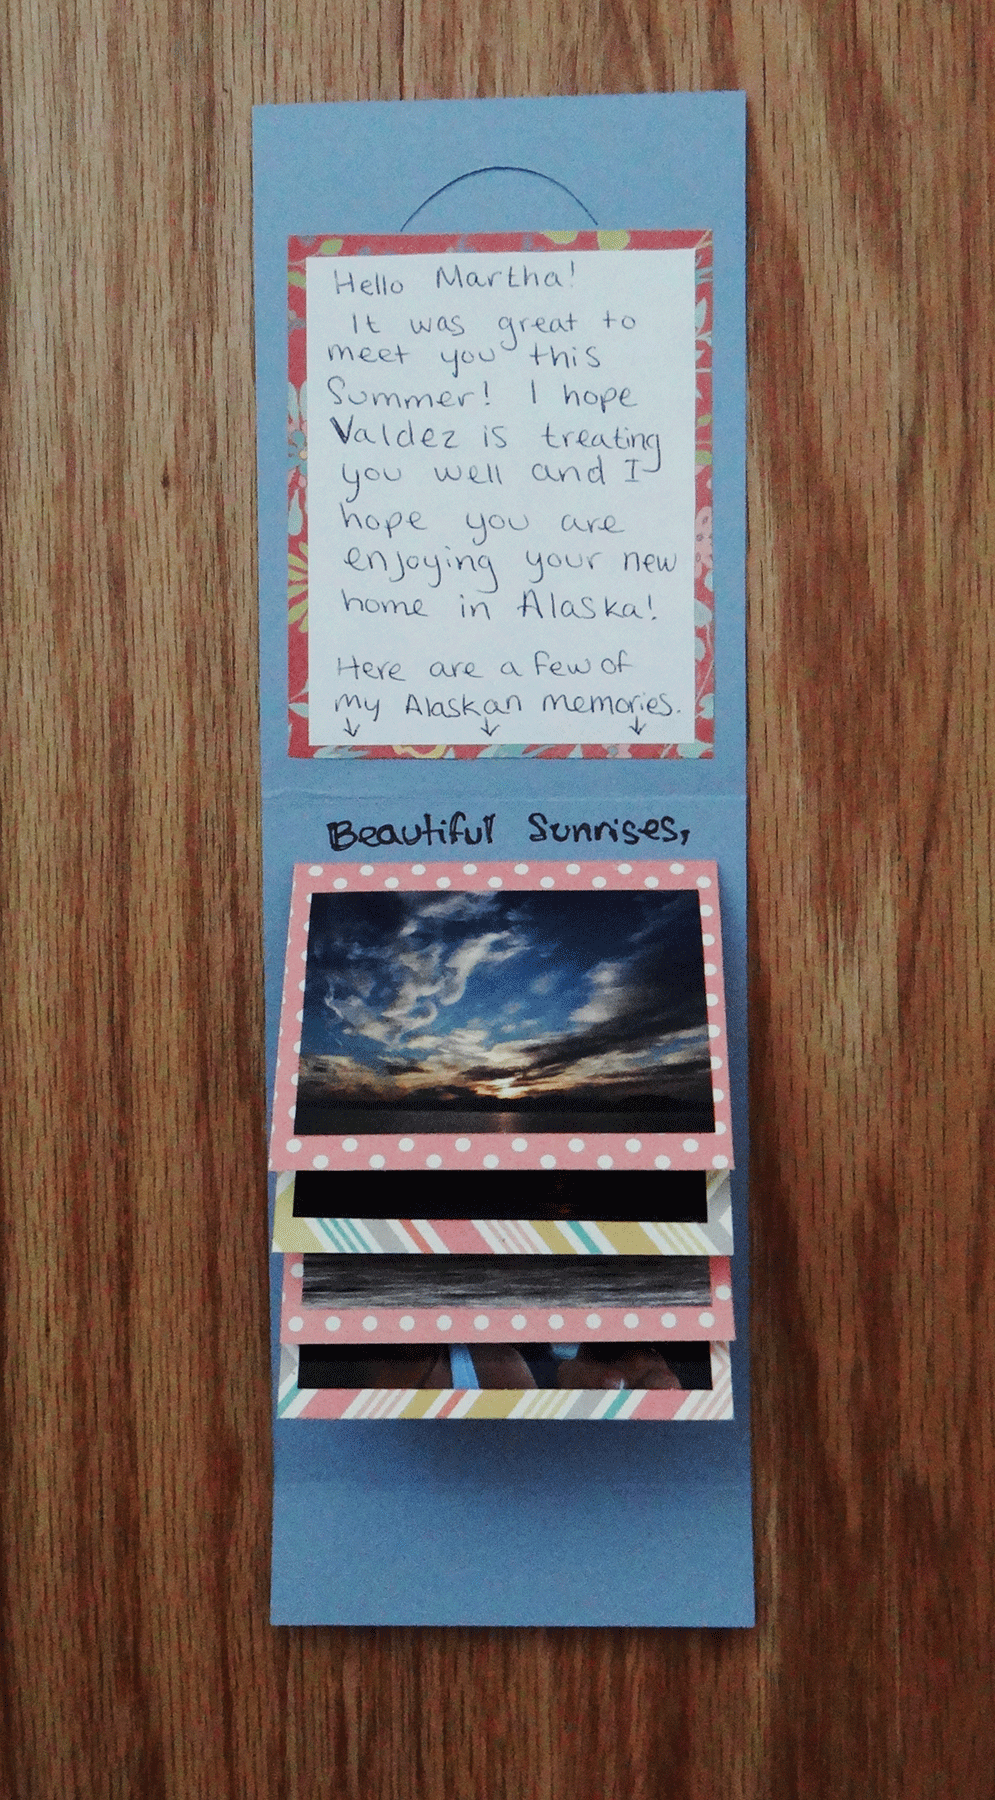
YAY, look how pretty your paper is! We wrote a note to our nana letting her know the newspaper subscription has been great, painted a birthday card for our brother, and made a banner (tutorial next week) with our homemade pages. Leave us a comment and let us know what you did with yours!
We will have more paper making tutorials coming soon with other techniques, adding color and sparkles, as well as different thicknesses and fun DIY projects using our handmade paper!


Comments